Tutorial
Command Center Enterprise, version 1.0
From Solar Technology, Inc
This is a tutorial to help you get started with Command Center. If you need more detailed information, refer to the Full Manual for Command Center.
Topics covered here
Let's get started!
Installing Command Center
- Make sure you have Java installed, version 6.0 or later. (If you're not sure, go here).
- Download Command Center for Windows from solartechnology.com. (If you need to run Command Center on an Apple or Linux computer, contact customer service.)
- Open the installer and follow the prompts.
Running Command Center for the first time
Start Command Center, and log in with the credentials you were given. This will include an organization, username, and password:

Logging in
Check the box to remember this login for next time, if desired.
Getting around
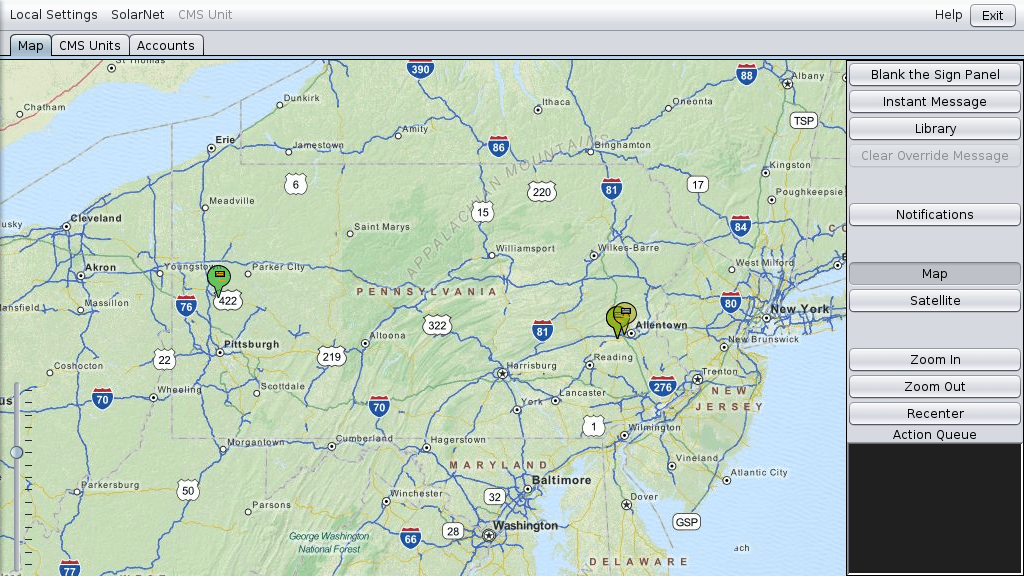
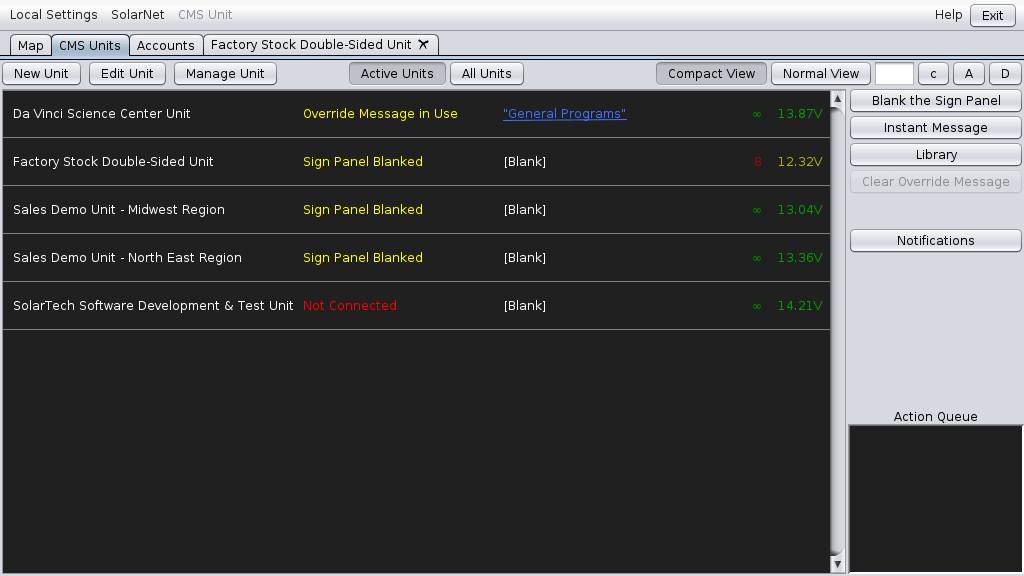
Command Center opens in Map view. Click the tabs near the top to change to an Asset view such as CMS Units view, or to manage accounts.
|
|
|
Map view
|
CMS Units view, one type of Asset view |
Connecting to signs and other assets
Adding New Assets
Your Command Center account needs to know about your assets (CMS units, arrow boards, etc) to be able to manage them. If you have purchased new assets and they do not yet appear when you start the Command Center software, follow these directions to add the new assets to your account.Adding a CMS Unit
In the CMS Units view, click Manage Units and then New.
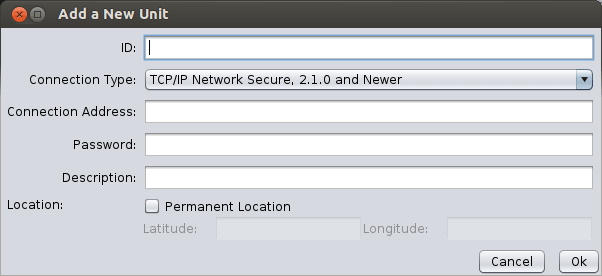
Adding a new unit
- In the ID field, enter a name for the unit.
- In the Connection Type field, select the appropriate
connection type. TCP/IP Network Secure is recommended for most units. (If needed, refer to the Connection Types table in the full manual.)
- In the Connection Address field, enter the unit's IP address. (If needed, refer to How do I find a CMS unit's IP address? in the full manual.)
- If your unit requires a password for access, enter that password in the Password field. (If your unit does not use a password, leave this field blank.)
- In the Description field, describe the unit for easy identification. This field is searchable, so choose a description that will help you as you are managing units, such as its location or purpose.
- Units' location is tracked by GPS, but if your unit is at a known location and you won't be using GPS to keep track of it, check Permanent Location and enter its coordinates.
- Click OK to finish. Repeat these steps to add additional units.
Finding assets on the map
When you start Command Center, all your units will be visible on the map. Some tips for navigation:- Drag the map to view different areas. Double click to zoom in (or use the Zoom In and Zoom Out buttons).
- Click a unit to view details; click again to select it (it will turn blue).
- Shift-drag to select units next to each other (a blue box will appear).
- Click Recenter to return to the original map with all units visible.
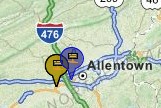
Selected units are indicated in blue.
When you select a unit on the map, it will remain selected when you switch to an asset view, and vice-versa. Use this feature to find units depending on their location (in map view) and their description (in asset view).
Using Asset View to find units
Go to the appropriate asset view (CMS Units, Arrow Boards, etc).- Type in the Search Units... box to search unit descriptions (units that don't match the search will disappear from the screen).
- Use the Display: drop-down to change which units show up in this view. (It defaults to Active Units, but you can use this to view deactivated units if needed.)
- Click an asset to select it. Click again to deselect it.
Changing messages on CMS units
Using an existing message
- Select the unit(s) you want to display the new message.
- Click the Library button.
- In the Library pane, select the message you'd like to display.
- Click Activate.

Clicking the Library button shows available messages for selected units, which you can preview and activate.
Creating a new message in a hurry (text only)
- Select the unit(s) you want to display the new message.
- Click the Instant Message button.
- Type to create the new message. When you're done, click the green smiley face.
- Decide if you want to set this as the Override message (it will display no matter what) or as a Default message (to be displayed only when, for example, previously scheduled messages aren't in effect.)
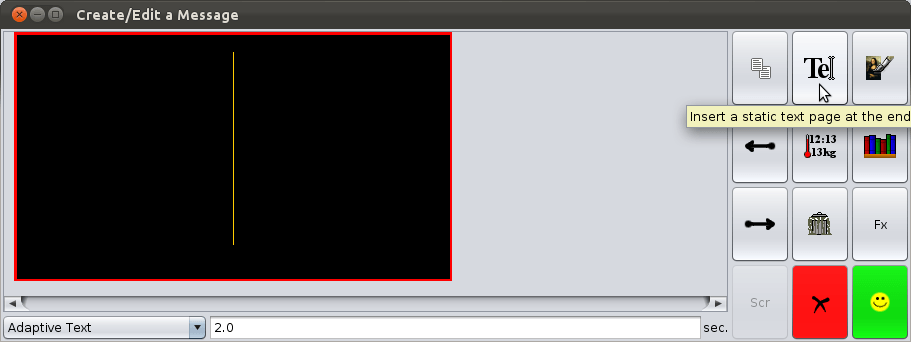
Creating a new message.
Each black rectangle is one page of the message.
Authorizing other users
You can authorize other people to manage some or all of your organization's assets. You'll do this from the Accounts tab.
Creating a New User
Click the Create New button. Here's the information you'll need to provide:

Creating a new user
- Username and Password: The user will use these to log in, along with your organization name.
- Full Name: So you remember who this is.
- Email address: Where they will receive notifications.
- Permissions: What they are allowed to do:
- Manage Units & Accounts: All permissions (including deleting accounts such as your own!) This is obviously for trusted users only.
- Manage Units: Users with this permission can do all unit management tasks (including everything in Advanced Control).
- Create Messages: Users with this permission can change and create messages, but won't be able to change settings or other advanced tasks.
- Change Messages Only: This is the lowest level of permissions; these users can change a sign's message to another message in the library, but can't create their own messages.
Changing users' permissions or information
In the Accounts tab, you can change users' information (name, email, etc) just by clicking on the field you want to change. The Permissions field will become a dropdown when you click on it. If a user has limited permissions (Manage Units, Create Messages, or Change Messages Only) then the last field will have a link. Click on it to restrict them to certain units. (Users who have permission to Manage Units & Accounts cannot be restricted.) Make sure to click the Save Changes button after making changes.
Users' other information, such as their name, can also be changed from this screen. Don't forget to click Save Changes.
Notifications when something changes
Notifications can be sent whenever some aspect of a unit's status changes: for example, when the unit is moved, or when an error is detected. Notifications are sent by email.
To set up notifications, select one or more units, and then click the Notifications button (on the right-hand side of any Asset or Map view.) You'll see this window:
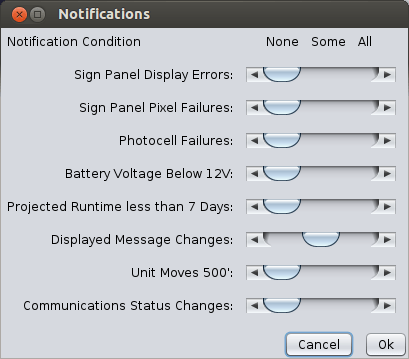
Sliders show notification settings at a glance.
Use the sliders to turn on notifications for anything you'd like, by switching to All. (You can't set it to Some units, because Command Center can't read your mind about which units you are thinking of. Select the units you want and set notifications to All.)
Most options are for error conditions, but here are some other useful ones.
- To keep tabs on a unit's location, choose Unit Moves 500'. You'll be notified if the unit moves 500 feet away from its current location.
- To keep track of whether the unit is always displaying the right message (useful when many people are authorized to change messages) choose Displayed Message Changes.
Advanced Control for a single unit
A complete explanation of Advanced Control is beyond the scope of this tutorial, but here's a quick overview. You'll find all the details in the Advanced Control section of the full manual.
Select a CMS unit, and then click the Manage Unit button. From there, select Advanced Control. A new tab will appear just for that unit:
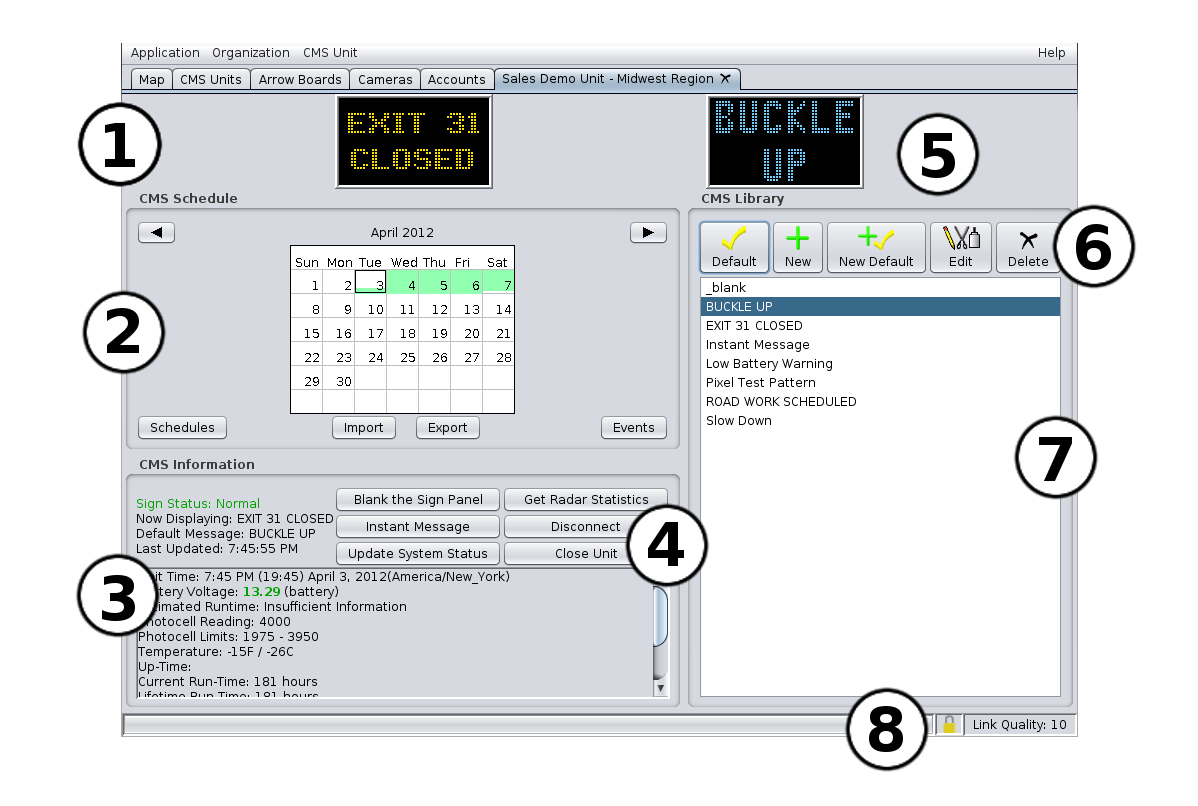
- Current message: what's playing right now.
- Schedules and events: green shading shows when a scheduled message will be in effect.
- Status information. (Energy management data is also available here.)
- Quick functions.
- Message preview: shows messages in the library as you select them. (blue color)
- Library tools: use with the library to create, edit, and delete messages on this unit.
- Library: The messages available on this unit.
- Status bar: shows progress of actions, and the quality of your connection to the sign.
That's it!
If you still have questions after reading this tutorial, you can probably find the answers in the full Command Center Manual.